Creating a custom web browser can be an exciting way to gain more control over your browsing experience and learn about how internet technology works behind the scenes. While most people rely on popular browsers like Chrome, Firefox, or Edge, developing your own allows you to tailor the interface, add specific features, and understand the underlying programming involved. This guide will walk you through the essential steps to design a basic web browser using Visual Studio on Windows, along with tips for customizing and optimizing your project.
Understanding the Basics of Web Browser Development
Building a web browser involves combining several key components: a user interface for navigation, a rendering engine for displaying web pages, and code that manages user input and server communications. While creating a fully-featured browser like Chrome or Firefox requires advanced programming skills and deep knowledge of rendering engines such as Blink or Gecko, you can start with a simple version that demonstrates core functionalities.
Developing your own browser not only enhances your programming skills but also provides insights into how websites are structured and displayed. It can also serve as a foundation for adding unique features that suit your specific needs. For more information on how to align your web design with SEO best practices, check out this resource on web design and SEO. Additionally, optimizing your browser or website’s performance, especially page load speed, is vital for user satisfaction; learn more about this at this detailed article on website speed and SEO.
Step-by-Step Guide to Creating a Basic Web Browser
1. Install and Set Up Visual Studio
Start by downloading and installing Visual Studio, which is a comprehensive integrated development environment (IDE) suitable for Windows. You can obtain it from the official Microsoft website. During installation, select the components necessary for desktop development with C# or Visual Basic, depending on your preference. Visual Studio provides all the tools you need to design, code, and test your browser project efficiently.
2. Create a New Project
Launch Visual Studio and set up a new project by navigating to the File menu and choosing New > Project. Select a Windows Forms Application template, which offers a graphical interface for designing your browser. This setup allows you to drag and drop UI components like buttons, text boxes, and web display areas onto your form.
3. Add the Web Browsing Component
Open the Toolbox panel by clicking on View > Other Windows > Toolbox. Locate the WebBrowser control within the toolbox and double-click it to add it to your form. This control provides the core functionality for rendering web pages. Adjust its size and position within the form to fit your design preferences.
4. Dock and Resize the Web Browser Window
Click on the WebBrowser control’s top-right arrow icon and select Undock in Parent Container to place it within your form. Resize the control by dragging its borders to your desired dimensions. Proper sizing ensures the browser appears correctly and provides ample space for web content.
5. Set Up the Default Website and Navigation
In the properties window, find the URL property of the WebBrowser control and set it to a default website of your choice. This allows your browser to load a specific page upon startup, giving you a visual idea of how web pages appear. To add navigation functionality, create a button labeled “Go” and assign it to trigger navigation to URLs entered in a text box.
6. Implement the Navigation Button
Add a Button control to your form and set its text to “Go”. Name it “GoBtn”. Double-click the button to generate a click event handler. Inside this handler, write code to navigate the WebBrowser to the URL specified in your address input box:
vb

WebBrowser1.Navigate(addressTxt.Text)
This allows users to type in any website address and load it dynamically.
7. Create and Connect the Address Bar
Place a TextBox control onto the form and name it “addressTxt”. This is your address bar. When the “Go” button is clicked, the browser will navigate to the URL entered here. Test this feature by entering different websites and verifying that your custom browser loads them correctly.
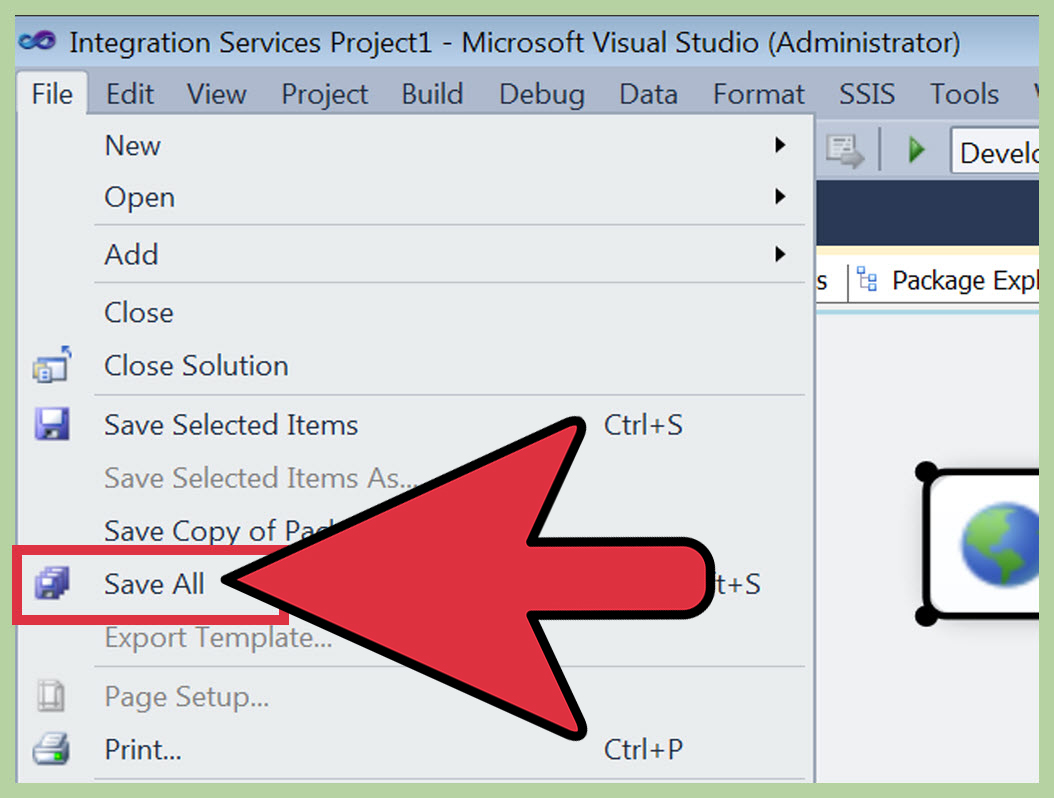
8. Save and Test Your Browser
Once everything is set up, save your project through the File menu. Build and run your application to test the navigation features. Clicking the “Go” button should bring you to the website specified in the address bar, demonstrating basic browsing capabilities.
9. Advanced Customizations (Optional)
To enhance your browser, consider adding features like back and forward buttons, refresh, or history tracking. You can also implement custom themes or integrate additional tools for better user experience. Experiment with other controls and APIs to extend functionality.
Tips for Developing and Optimizing Your Browser
-
For those who prefer not to use Visual Studio, alternative tools such as Q-R Web Browser Maker or Flock Social Web Browser Maker offer preset options and simplified customization. These tools streamline the process for beginners seeking quick results.
-
Keep in mind that even if you develop a custom browser, many users prefer pre-built options like Firefox or Chrome because they offer extensive features and high levels of customization through themes, add-ons, and extensions. However, developing your own can deepen your understanding of web technologies.
-
To ensure your browser performs well, optimize aspects like page load times and rendering efficiency. Improving these factors can significantly enhance user experience. Learn about the critical role of website speed at this resource.
-
If you’re interested in more advanced browser development, studying how open-source browsers like Chromium are built can be very educational. This involves programming in languages like C++ and working with complex source code.
Additional Resources and References
- For comprehensive guidance on creating custom web browsers, visit Make Tech Easier.
- To explore the capabilities of Visual Studio and related tools, see Visual Studio documentation.
- For tips on integrating web design best practices with development, review web design and SEO principles.
- To understand how to improve your website’s speed and its impact on SEO, consult this article.
Creating your own web browser combines programming skills with creativity, enabling you to craft a tool tailored to your browsing needs. Whether for learning or personal projects, this process offers valuable insights into web technologies and software development.